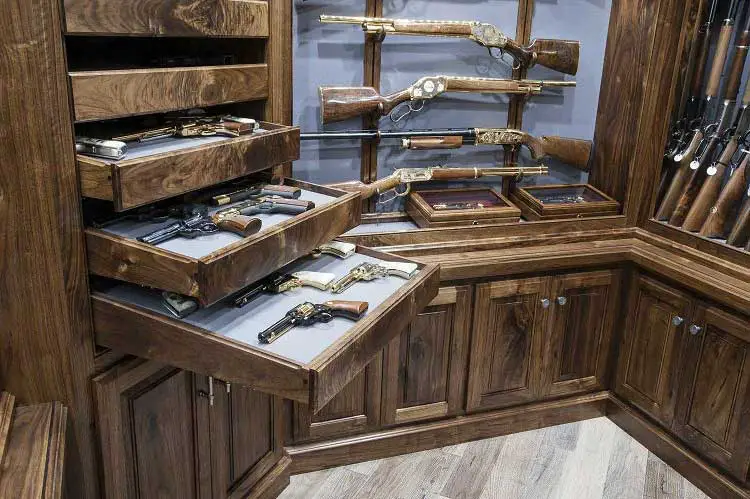
Alright, so you're thinking about building a custom in-wall gun cabinet. Smart move! It's a great way to keep your firearms secure, out of sight, and organized. But let's be honest, the standard gun safes you find at the store can be clunky and just don't always fit the style of your home. Plus, you might have some specific needs, like needing to store long guns or a bunch of ammo, that you can't find pre-made.
That's where the fun of a custom in-wall gun cabinet comes in. You get to tailor it to your exact needs and preferences. It can be as simple or as complex as you want, and it can even blend seamlessly into the surrounding walls, making it practically invisible.
But before you grab your power tools and start ripping out drywall, let's break down the whole process.
Step 1: Planning and Design
This is the most important step, and it's where you really need to get creative.
Think about these key things:
Location, location, location! Where in the wall will your cabinet be? You need to consider access, visibility, and structural integrity. Don't go putting it in a load-bearing wall, for example! You might even want to call a structural engineer for advice if you're unsure.
What are you storing? Long guns, handguns, ammo, optics? This will determine the size and layout of your cabinet.
Security features: What kind of lock do you want? Do you need motion sensors or alarms?
Budget: Building a custom cabinet can cost a bit more than buying a pre-made one, so set a realistic budget.
Aesthetics: Do you want the cabinet to be completely hidden, or do you want a more visible design? What style will complement your room?
The Sketchy Part (but in a good way!):
Now, get out a pencil and paper (or fire up your favorite design software), and start sketching out your ideas.
Here are some tips:
Draw a detailed plan of the wall space: Measure the width, height, and depth accurately. This will help you determine the overall size of your cabinet.
Sketch out the layout: Where will the shelves and doors go? Consider how you'll access your firearms and keep them organized.
Don't forget the details: Think about door hinges, locks, ventilation, and even lighting inside the cabinet.
Step 2: Choosing Materials and Hardware
You've got your design, now it's time to get the right materials.
The Foundation:
Drywall: Standard drywall will work fine, but you might want to consider using moisture-resistant drywall if you're building the cabinet in a humid area.
Framing: You'll need wood studs to build the frame of your cabinet. Use pressure-treated lumber if the cabinet will be near a moisture source.
Sheathing: Plywood or OSB sheathing will provide structural support for the cabinet.
Door Material: Wood, metal, or even something more modern like glass can be used for the doors. Make sure it's durable enough to withstand security threats.
Don't Forget the Essentials:
Locks and Hinges: Invest in high-quality locks and hinges, especially if you want extra security.
Shelving: Choose shelves that can support the weight of your firearms and other items.
Lighting: Add some interior lighting to make it easier to see what you're grabbing.
Ventilation: Proper ventilation will help prevent moisture buildup inside the cabinet.
Step 3: Construction
Okay, now the real fun begins!
Building the Cabinet:
1. Cut your materials to size: Use a circular saw or table saw for accurate cuts.
2. Assemble the frame: Use screws, nails, or construction adhesive to join the framing pieces together. Make sure the frame is square and level.
3. Install the sheathing: Attach the plywood or OSB sheathing to the frame.
4. Build the shelves and doors: Cut the shelves and doors to size and attach them to the frame.
5. Install the locks and hinges: Follow the manufacturer's instructions for installing the locks and hinges.
Securing the Cabinet:
1. Prepare the wall space: Cut out a section of drywall to fit your cabinet frame.
2. Secure the frame to the wall: Use screws or bolts to attach the cabinet frame to the wall studs.
3. Finish the wall: Install new drywall, tape the seams, and paint or wallpaper over the area to blend in.
Step 4: Finishing Touches
Almost there!
Time to Add the Finishing Touches:
1. Install the doors: Hang the doors on the hinges and make sure they close securely.
2. Add the hardware: Install the handles, knobs, and other hardware.
3. Apply a sealant: Apply a sealant to the door edges to protect them from moisture.
4. Test the lock: Make sure the lock works properly and is securely fastened.
Step 5: Enjoy Your Custom In-Wall Gun Cabinet!
You've done it! Now you can enjoy your secure, custom-designed gun cabinet that blends seamlessly into your home.
Bonus Tips:
Invest in high-quality tools: This will make the construction process much easier and ensure that the cabinet is well-built.
Take your time: Don't rush the process. It's better to take your time and do it right than to rush and make mistakes.
Don't be afraid to ask for help: If you're not comfortable with certain construction tasks, don't hesitate to ask a friend, family member, or professional for help.
Building a custom in-wall gun cabinet is a project that requires time, effort, and attention to detail. But with careful planning and execution, you can create a secure, stylish, and functional storage solution for your firearms. And hey, who doesn't love a little DIY satisfaction?