Wednesday, February 5, 2025

Payment Plans for Furniture Affordable Buying Options

Payment Plans for Furniture: Affordable Buying Options

Furnishing your home can be an exciting but expensive undertaking. The allure of that perfect sofa or stunning dining set can quickly clash with the reality of your budget. Fortunately, numerous payment plans and financing options exist to make those dream pieces more attainable. This article explores several affordable ways to acquire the furniture you desire without breaking the bank.

Understanding Your Financing Options

Before diving into specific plans, understand your credit score and spending habits. A higher credit score typically unlocks better interest rates and more favorable terms. Honest self-assessment is crucial. Consider your monthly budget and how much you comfortably can afford to allocate to furniture payments. Rushing into a plan you can't manage leads to stress and potentially damaging your credit.

Store-Specific Financing

Many furniture retailers offer in-house financing programs. These often involve interest-free periods (for a limited time) or low-interest rates, making them attractive options. Read the fine print carefully, however. Missed payments can incur hefty late fees and significantly increase the overall cost. Always compare interest rates and terms across different stores before committing. Look for transparent terms and conditions that clearly outline payment schedules and penalties for late payments.

Third-Party Financing Companies

Companies like Affirm, Klarna, and PayPal Credit partner with retailers to provide financing options. These platforms often offer flexible payment plans tailored to individual budgets, allowing you to spread the cost over several months or even years. These platforms typically perform a soft credit check, meaning your credit score isn't drastically impacted. However, always check the interest rates and fees associated with using these services, as they can vary significantly based on your creditworthiness and the purchase amount.

Rent-to-Own Options

Rent-to-own programs allow you to pay for furniture monthly, eventually owning it after a set period. This option often comes with higher overall costs compared to traditional financing, so carefully weigh the pros and cons. Understand the total cost, including all payments, and compare it to the retail price before opting for this approach. It's a helpful solution for those with limited credit history or facing immediate furniture needs, but it can become costly in the long run.

Tips for Smart Furniture Financing

Regardless of the payment plan you choose, strategic planning can save you money and prevent financial strain:

  • Create a realistic budget: Determine how much you can comfortably afford to pay each month without compromising other essential expenses.
  • Compare interest rates and fees: Don't solely focus on monthly payments; examine the total cost over the loan's lifetime.
  • Read the fine print: Understand all terms and conditions, including late payment penalties and prepayment options.
  • Prioritize needs over wants: Focus on essential furniture first before adding non-essential items.
  • Shop around: Compare prices and payment plans across different retailers before making a purchase.

By carefully researching your options and following these tips, you can confidently furnish your home with beautiful, high-quality furniture while managing your finances responsibly.

Read More..

Step-by-Step Woodworking Plans for Quality Creations

Step-by-Step Woodworking Plans for Quality Creations

Hey there, fellow woodworkers! So you're looking to build something amazing, something you can be truly proud of? That's awesome! Woodworking is a fantastic hobby – rewarding, challenging, and endlessly creative. But let's face it, sometimes those fancy woodworking plans can feel a bit… intimidating. That's why I'm here to break it down for you, in a way that's easy to understand and follow, no matter your skill level. Let's get started on your next masterpiece!

Choosing Your Project: From Simple to Spectacular

The first step, and arguably the most important, is choosing your project. Don't jump into a super complex build right away if you're just starting. Think about your skill level and the time you have available. Starting with something smaller and simpler will build your confidence and teach you valuable techniques.

Beginner-Friendly Projects:

  • Simple Shelves: A great introduction to measuring, cutting, and assembling. You can even get creative with the stain or paint!
  • Small Wooden Box: Mastering miter joints and learning about proper wood glue application is key here. Perfect for storing small items or even as a gift!
  • Coasters: A fun project to experiment with different wood types and finishes. Plus, everyone needs coasters!

Intermediate Projects:

  • Adirondack Chair: A classic project that challenges your joinery skills and introduces you to more complex cuts.
  • Small Coffee Table: This requires precise measurements and careful assembly, but the result is well worth the effort.
  • Birdhouse: A charming project that allows you to get creative with design and add some personality.

Advanced Projects (For Experienced Woodworkers):

  • Full-Size Dining Table: This is a significant undertaking, requiring advanced joinery, finishing, and potentially even wood bending techniques.
  • Custom Bookshelves: A chance to design and build truly unique storage solutions, tailored to your exact needs.
  • Detailed Wooden Toys: Requires exceptional precision and attention to detail, but the results are stunning.

Remember, even "advanced" projects can be broken down into smaller, manageable steps. Don't get overwhelmed! Choose something that excites you and challenges you in a good way.

Gathering Your Tools and Materials

Now that you've chosen your project, it's time to gather your tools and materials. Having the right tools makes a huge difference. Don't skimp on quality, especially when it comes to essential tools like your saw and measuring tape.

Essential Tools:

  • Measuring Tape: Accuracy is everything in woodworking!
  • Pencil: For marking your cuts and measurements.
  • Hand Saw or Circular Saw: For cutting your wood.
  • Wood Plane: For smoothing out rough edges.
  • Chisels: For shaping and fine detail work.
  • Screwdriver (or Drill): For assembling your project.
  • Sandpaper: For smoothing and finishing your project.
  • Safety Glasses: Always protect your eyes!

Choosing Your Wood:

The type of wood you choose will greatly affect the final look and feel of your project. Consider the hardness, grain, and color when making your selection. Pine is a great beginner-friendly option, while hardwoods like oak or maple offer more durability and a richer look. Always check the wood for knots or cracks before starting your project.

Step-by-Step Construction: A Sample Project (Simple Shelves)

Let's build some simple shelves together! This is a perfect project for beginners.

Step 1: Planning and Measuring

Decide on the dimensions of your shelves. Measure carefully and double-check your measurements! Draw a simple sketch to visualize your design.

Step 2: Cutting the Wood

Use your saw to cut the wood to the dimensions you've planned. Make sure your cuts are straight and clean. If using a hand saw, clamp the wood securely to prevent it from moving.

Step 3: Assembling the Shelves

Use wood glue and screws to attach the shelf supports to the wall brackets. Ensure the shelves are level and aligned properly.

Step 4: Sanding and Finishing

Sand all surfaces smooth to remove any splinters or rough edges. Apply a wood stain or paint to protect and enhance the appearance of your shelves.

Finishing Touches: Staining, Painting, and Sealing

The finishing touches are what really bring your project to life. A well-finished piece will not only look great but will also be more durable and protected from the elements.

Staining:

Staining enhances the natural beauty of the wood grain. Follow the instructions on the stain carefully to achieve the desired results.

Painting:

Painting allows for more creative freedom. Choose a paint that is suitable for wood and apply several thin coats for even coverage.

Sealing:

Sealing protects your project from moisture and wear. Apply a clear sealant or varnish to enhance its longevity and appearance.

Commonly Asked Questions

Q: What kind of wood glue should I use? A: Wood glue specifically designed for woodworking projects. Yellow wood glue is a common and reliable choice.

Q: How do I prevent wood from splitting when screwing it? A: Pre-drill pilot holes slightly smaller than your screw diameter. This will help prevent the wood from cracking.

Q: What's the best way to clean up wood glue? A: Clean up excess glue immediately with a damp cloth. Once dried, it's much harder to remove.

Q: What safety precautions should I take? A: Always wear safety glasses, and consider a dust mask, especially when sanding or using power tools. Work in a well-ventilated area.

Q: Where can I find woodworking plans? A: There are countless resources online, including websites, blogs, and YouTube channels dedicated to woodworking. You can also find books and magazines with detailed plans.

Happy woodworking! Remember to take your time, enjoy the process, and don't be afraid to experiment. The more you practice, the better you'll become. And most importantly, have fun!

Read More..

Sunday, February 2, 2025

Pergola Plans for Building a Cozy Outdoor Lounge Space

Escape to Serenity: Designing Your Dream Pergola Lounge

Transform your backyard into a tranquil oasis with a custom-built pergola. This architectural marvel offers shade, style, and the perfect backdrop for creating a cozy outdoor lounge. Forget generic patio furniture arrangements; envision a space designed entirely around your comfort and aesthetic preferences. This guide provides comprehensive pergola plans to help you build that dream retreat.

Planning Your Pergola Paradise: Location, Size, and Style

Before you even think about hammering a nail, carefully consider the location for your pergola. Choose a spot that receives ample sunlight (or shade, depending on your preference), yet offers protection from harsh winds. Assess the existing landscape, noting existing structures and mature plants that could influence the pergola's placement and size. Consider the overall feel you're aiming for – a rustic retreat, a modern minimalist haven, or a romantic bohemian escape? This decision dictates the pergola's style, materials, and finishing touches.

Choosing the Perfect Spot

Maximize your outdoor space by selecting a location that seamlessly integrates your pergola with the existing landscape. Avoid placing it directly under overhanging branches which can create a mess of leaves and potential damage. Consider proximity to existing pathways, your home's doors, and other outdoor features. Imagine the flow of traffic and your line of sight – you want easy access to your peaceful sanctuary.

Determining Dimensions and Materials

Determine the pergola's dimensions based on the available space and intended use. A smaller pergola can provide intimate seating for two, while a larger one can accommodate comfortable lounging for a group. Select robust, weather-resistant materials like pressure-treated lumber, cedar, or redwood for durability and longevity. Consider your budget and aesthetic preference when selecting materials – each offers a unique look and feel.

Construction Details: A Step-by-Step Guide

Building your pergola is a rewarding undertaking. Start by preparing the ground, ensuring a level foundation is established for stability. Follow your chosen design plans meticulously, using appropriate fasteners and construction techniques. Careful measurement and precise cutting are paramount to ensure a structurally sound and visually appealing structure. Don't forget to prioritize safety throughout the entire process!

Laying the Foundation

A solid foundation is crucial. For a smaller pergola, you may be able to use concrete footings. For larger structures, consider using concrete piers for enhanced support. Ensure the footings are level to avoid structural problems down the line. Use a level to verify everything is perfectly aligned before proceeding.

Framing and Roofing

Construct the pergola's frame using your chosen materials, paying close attention to squareness and alignment. Once the frame is complete, install the roofing. The roofing material significantly impacts the overall look and feel; options include lattice, solid panels, canvas, or even retractable awnings for flexible shade. Consider your climate and personal preferences when making this decision. Remember to leave sufficient gaps for air circulation to prevent moisture buildup.

Adding the Finishing Touches: Creating a Cozy Lounge

Once the pergola is built, it's time to personalize your outdoor lounge! Choose comfortable seating – think plush cushions, soft throws, and weather-resistant furniture. Incorporate outdoor lighting for an enchanting ambiance; string lights, lanterns, or solar-powered path lights all add to the magical atmosphere. Consider adding climbing plants to soften the structure and create a more natural feel. Let your creativity flourish and create a unique space that reflects your individual style.

Lighting and Greenery

Lighting dramatically enhances the atmosphere. Choose warm-toned lighting for a relaxing ambience. Greenery adds a touch of nature and helps create a secluded retreat. Consider climbing plants like ivy or jasmine to create a lush, green canopy overhead.

Furnishings and Accessories

Select furnishings that complement the pergola's style and offer comfort. Choose weather-resistant materials and add plush cushions for a touch of luxury. Add personal touches such as decorative pillows, throws, and outdoor rugs to create a welcoming and inviting atmosphere. Remember to protect your furniture from the elements when not in use.

With careful planning and attention to detail, you can build a stunning pergola that transforms your backyard into a tranquil and inviting outdoor lounge. Enjoy the process and savor the rewards of your hard work in your new peaceful retreat!

Read More..

Rustic Barrel Furniture Plans for Unique and Cozy Home Additions

Rustic Barrel Furniture Plans for Unique and Cozy Home Additions

Hey there, fellow DIY enthusiasts! Are you looking to add some serious character and charm to your home without breaking the bank? Then you've come to the right place! I'm obsessed with repurposing and upcycling, and nothing quite screams rustic charm like furniture made from old wine barrels. They're beautiful, sturdy, and tell a story – a story you can be a part of by turning them into stunning pieces for your home.

Why Choose Wine Barrel Furniture?

Before we dive into the fun part (the plans!), let's talk about why wine barrels are such a fantastic choice for DIY furniture. First off, they're naturally beautiful. The wood is rich, often showing gorgeous variations in color and texture from years of aging. Secondly, they're incredibly durable. These barrels have stood up to years of holding heavy liquids, so you know they're built to last. And finally, they're eco-friendly! Repurposing old barrels gives them a new life, reducing waste and adding a sustainable touch to your home decor.

Finding Your Perfect Barrels

The first step in your barrel furniture journey is sourcing your materials. You can often find used wine barrels at:

  • Local wineries: Many wineries are happy to sell or even give away old barrels.
  • Breweries: Similar to wineries, breweries may have used barrels they're willing to part with.
  • Online marketplaces: Sites like Craigslist, Facebook Marketplace, and eBay can be goldmines for finding barrels.
  • Antique stores and salvage yards: These places are treasure troves of unique materials, including old wine barrels.

When choosing your barrels, check for structural integrity. Look for any significant cracks or damage that might compromise the piece you're planning to build. A little wear and tear adds character, but major damage could make your project more difficult.

Simple Barrel Furniture Projects: Easy to Follow Plans

Now for the exciting part – the projects! Let's explore some beginner-friendly ideas you can tackle even if you're a DIY novice.

1. The Rustic Barrel Coffee Table

This is a classic and incredibly straightforward project. All you really need is a barrel (obviously!), some sturdy legs (you can find these at most hardware stores), and some simple tools like a saw, drill, and screws. Cut the barrel in half (or leave it whole for a larger coffee table!), attach the legs, and voila! You have a stunning, unique coffee table that's sure to be a conversation starter.

Tip: Sand the barrel thoroughly before adding the legs for a smoother finish. You can also stain or paint the wood to match your home decor.

2. Charming Barrel Bar Stools

Turning wine barrels into bar stools is another fun and relatively simple project. You'll need to cut the barrel into sections of the desired height for your stools, adding a comfortable seat cushion on top. Again, sturdy legs will provide support. Consider adding a backrest for extra comfort. This project is perfect for a rustic kitchen or bar area.

Tip: Use a waterproof sealant to protect the wood from spills and moisture if using it in a bar setting.

3. Rustic Barrel Planters

For a touch of outdoor charm, turn your barrels into unique planters. This is one of the simplest projects; you may not even need to cut or modify the barrel at all! You can either use the barrel as it is, planting directly into the wood (make sure to line it to prevent leaks), or simply create a charming hanging planter by adding some hooks.

Tip: Drill drainage holes in the bottom of the barrel if you plan on using it as a planter, and consider lining it with landscape fabric to prevent soil from falling through the gaps.

4. Barrel Head Wall Art

Don't want to tackle a large-scale project? No problem! You can use the barrel heads to create gorgeous wall art. Sand them smooth, add some stain or paint, and hang them individually or create a stunning collection. You could even incorporate mirrors for a unique and reflective piece.

Tip: Use stencils or freehand designs to add personal touches and patterns to the barrel heads.

Beyond the Basics: More Advanced Barrel Furniture Projects

Once you've mastered the basics, you can move on to more challenging and rewarding projects. Think about creating:

  • Barrel-topped kitchen islands: Imagine a beautiful kitchen island with a wine barrel as its countertop – stunning!
  • Barrel bookshelves: Stacked barrel sections can create a unique and rustic bookshelf.
  • Outdoor barrel furniture: Barrels can become beautiful outdoor seating, side tables, or even unique fire pits with a little more advanced woodworking skills.

The possibilities are truly endless! The key is to let your creativity flow and experiment with different designs and techniques. Remember to always prioritize safety and take your time with each step.

Commonly Asked Questions

Q: What kind of wood are wine barrels made of?

A: Most wine barrels are made of oak, known for its strength and ability to impart subtle flavors to the wine.

Q: Do I need special tools for these projects?

A: Basic woodworking tools like a saw, drill, screwdriver, and sandpaper will suffice for most projects. More complex projects might require additional tools.

Q: How do I clean a used wine barrel before starting a project?

A: Thoroughly scrub the barrel with soap and water to remove any residual wine or debris. Let it dry completely before starting your project.

Q: How can I protect the finished furniture from the elements?

A: Apply a high-quality wood sealant or varnish, particularly if you're using the furniture outdoors or in a high-moisture area.

Q: Where can I find plans for more advanced projects?

A: You can find many plans online through woodworking websites and blogs, or consider purchasing woodworking books from libraries or bookstores.

Happy building, and remember to share your creations with me! I'd love to see what you come up with. Let the rustic charm begin!

Read More..

Sunday, January 26, 2025

How to build custom DIY wooden furniture for home

Unlock Your Inner Craftsperson: Building Custom Wooden Furniture

The allure of handcrafted furniture is undeniable. The unique character, the satisfying weight, the knowledge that you built it yourself â€" these are rewards far beyond the price tag of mass-produced pieces. This guide empowers you to embark on your own DIY furniture journey, transforming raw lumber into stunning, functional pieces for your home. We'll walk you through the process, from initial design to the final protective finish, ensuring you create furniture you'll cherish for years to come.

Phase 1: Design and Planning â€" Laying the Foundation

Before you even touch a saw, meticulous planning is crucial. Begin by visualizing your dream piece. What style are you aiming for? Mid-century modern? Rustic farmhouse? Consider the space it will occupy, measuring carefully to ensure a perfect fit. Sketch your design, noting dimensions, material choices, and joinery techniques. Many free online design tools can help you visualize your project in 3D, allowing you to tweak proportions and refine your aesthetic before committing to the build.

Choosing Your Wood:

Select wood species based on your design goals and budget. Hardwoods like oak, maple, and cherry offer durability and stunning grain patterns but come at a higher price. Softwoods such as pine and fir are more affordable and easier to work with, ideal for beginners. Consider the wood's color, grain, and overall aesthetic impact on your final piece.

Phase 2: Gathering Tools and Materials â€" Equipping Your Workshop

Building furniture requires specific tools. Don't rush this step; acquiring quality tools ensures accuracy and safety. Invest in essential items such as a measuring tape, pencil, saw (hand saw or circular saw), chisels, clamps, sandpaper, and a drill. More advanced projects might necessitate a planer, jointer, or router. Research the specific tools required for your chosen design and joinery techniques. Don't forget safety equipment: safety glasses, ear protection, and a dust mask are non-negotiable.

Creating Your Materials List:

Once your design is finalized, create a detailed list of all materials needed, including:

  • Wood boards, cut to your specified dimensions.
  • Wood glue.
  • Screws or nails (depending on your joinery).
  • Wood finish (stain, paint, varnish, or sealant).
  • Any additional hardware, such as drawer slides or hinges.

Phase 3: Construction â€" Bringing Your Vision to Life

With your plans and materials ready, it's time to build! Follow your design meticulously, ensuring accurate measurements and precise cuts. Begin by assembling the framework, using appropriate joinery techniques like dowel joints, mortise and tenon joints, or pocket hole screws. Remember to use wood glue for added strength and stability. Clamp all pieces securely while the glue dries completely before moving on to the next step. Take your time and focus on accuracy; rushing can lead to mistakes that are difficult to correct.

Phase 4: Finishing Touches â€" The Grand Reveal

Once the construction is complete, sand all surfaces smooth, paying attention to corners and edges. Apply your chosen finish â€" whether stain to enhance the wood's natural beauty or paint for a bolder look. Follow the manufacturer's instructions carefully for each finishing product. Allow ample drying time between coats. Finally, install any necessary hardware, like drawer slides or hinges, and admire your handcrafted masterpiece!

Phase 5: Enjoy Your Creation â€" The Sweet Reward

Congratulations! You've successfully built your own custom wooden furniture. Enjoy the pride and satisfaction of creating something beautiful and functional for your home. Remember that practice makes perfect. Each project you undertake will hone your skills, allowing you to tackle more ambitious furniture-making ventures in the future. So, grab your tools, unleash your creativity, and start building!

Read More..

Saturday, January 25, 2025

DIY Wooden Planter Boxes for Outdoor or Indoor Gardens

DIY Wooden Planter Boxes: Get Your Hands Dirty (and Your Wood!)

Hey there, fellow plant lovers! Are you tired of those boring, plastic planters? Do you dream of stylish, handcrafted containers showcasing your gorgeous greenery? Well, grab your tools and let's build some awesome DIY wooden planter boxes! Whether you're decking out your patio, sprucing up your indoor space, or just want a fun weekend project, this guide will walk you through creating beautiful and functional planters from scratch.

Choosing Your Wood and Design

Before we even think about sawing, let's talk about the star of the show: the wood! The best type really depends on your budget and the look you're going for. Here are a few popular choices:

Cedar: The Classic Choice

Cedar is a fantastic option because it's naturally rot-resistant and weather-resistant, making it perfect for outdoor planters. Plus, it smells amazing! However, it can be a bit pricier than other woods.

Pine: Budget-Friendly and Beautiful

Pine is a much more affordable choice and readily available at most home improvement stores. It's easy to work with, but it's not as naturally resistant to rot and weather as cedar. You'll need to treat pine with a sealant if you plan to use it outdoors.

Reclaimed Wood: Eco-Friendly and Unique

Giving old wood a new life is both eco-friendly and stylish! Reclaimed wood adds character and charm to your planter boxes, and you can find some amazing pieces at salvage yards or even repurpose old pallets (just make sure they haven't been treated with harmful chemicals!).

Once you've picked your wood, it's time to think about design. Do you want a simple, rectangular box? Or something more elaborate with curved edges or decorative trim? Sketch out a few ideas â€" don't be afraid to get creative! Consider the size and shape you need based on the plants you plan to grow. Measure twice, cut once, as they say!

Gathering Your Supplies

Now for the fun part: shopping! Here's a list of tools and materials you'll likely need. Remember, this list might vary slightly depending on your design:

  • Wood: Choose your preferred type and calculate the amount needed based on your design.
  • Measuring Tape & Pencil: For accurate measurements and marking your cuts.
  • Saw: A circular saw or miter saw is ideal for clean cuts, but a hand saw will work too (just be prepared for a bit more elbow grease!).
  • Drill and Drill Bits: For pilot holes (essential to prevent the wood from splitting when you screw it together) and any decorative holes you might want.
  • Screws: Exterior-grade screws are best for outdoor planters to withstand the elements. Choose a length appropriate for the thickness of your wood.
  • Wood Glue: Adds extra strength and stability to your joints.
  • Clamps: To hold the wood pieces together while the glue dries.
  • Sandpaper: For smoothing out rough edges and creating a nice finish.
  • Wood Sealer/Stain (optional): To protect the wood from weather damage and enhance its appearance. Choose a sealer suitable for exterior use if needed.
  • Planting Liner (optional): Helps protect the wood and makes cleaning easier. You can use landscape fabric, plastic sheeting, or even a repurposed plastic bag.

Building Your Planter Box: A Step-by-Step Guide

Okay, let's get building! This is a general guide; your specific steps may vary slightly depending on your design. For the sake of simplicity, we'll assume we're building a simple rectangular planter box.

Cut Your Wood

Carefully cut your wood pieces to the desired dimensions, making sure your cuts are square and precise. Double-check your measurements before making any cuts!

Assemble the Box

Apply wood glue to the edges of your wood pieces and then clamp them together. Pre-drill pilot holes and then screw the pieces together securely. Make sure the corners are square and aligned.

Sand and Finish

Once the glue is dry, carefully remove the clamps. Sand down any rough edges and splinters to create a smooth surface. If you are using a wood sealer or stain, apply it according to the manufacturer's instructions.

Add a Liner (Optional)

If you're using a planting liner, cut it to size and insert it into the planter box. This will prevent the soil from directly contacting the wood and help to maintain moisture.

Plant Your Beauties!

And there you have it! Your beautiful, handcrafted planter box is ready to be filled with your favorite plants. Enjoy your new gardening masterpiece!

Beyond the Basics: Adding Flair to Your Planter Boxes

Feeling ambitious? Let's take your planter box game to the next level! Here are some ideas to add a personal touch:

  • Decorative Trim: Add molding or trim pieces to the edges of your planter box for a more elegant look.
  • Inlay Designs: Use contrasting wood pieces or other materials to create intricate designs.
  • Legs or Stands: Elevate your planter box with decorative legs or stands for a unique touch.
  • Painted Designs: Get creative with paint! Use stencils or freehand designs to add color and personality to your planter.
  • Metal Accents: Add metal brackets, handles, or other hardware for a rustic or industrial vibe.

Remember, the possibilities are endless! Let your creativity shine!

Commonly Asked Questions

Q: What kind of wood is best for outdoor planter boxes?

A: Cedar is a great choice due to its natural rot and weather resistance. However, pressure-treated pine is also a good, more affordable option, as long as you ensure it's safe for plant use.

Q: Do I need to use a wood sealer?

A: It's highly recommended, especially for outdoor planters made from wood like pine, which is prone to rotting. A good quality wood sealer will protect your planter and extend its lifespan.

Q: How do I prevent the wood from rotting?

A: Using rot-resistant wood like cedar is a great start. Using a wood sealer, ensuring good drainage (with drainage holes in the bottom), and avoiding letting the planter sit in standing water are also crucial steps.

Q: What size should my planter box be?

A: The size depends entirely on the plants you plan to grow! Consider the mature size of your plants and ensure there's enough space for their roots to spread.

Q: Can I use reclaimed wood for my planter box?

A: Absolutely! Reclaimed wood can add a unique character to your planter, but make sure to check for any embedded nails or sharp objects before you start building. Also, ensure that it hasn’t been treated with chemicals harmful to plants.

Happy building, and happy gardening!

Read More..

Wednesday, November 20, 2024

DIY Woodworking: The Best Dado Joints for Building Drawers

DIY Woodworking: The Best Dado Joints for Building Drawers

DIY Woodworking: The Best Dado Joints for Building Drawers

When it comes to constructing durable and aesthetically pleasing drawers, choosing the right joint is paramount. Among the various joinery techniques, dado joints stand out as a reliable and robust option. Their strength and stability, combined with their ease of construction, make them a popular choice for DIY woodworkers. This article delves into the world of dado joints, exploring their advantages, different types, and best practices for creating them.

Understanding Dado Joints

A dado joint is a recessed groove cut into a piece of wood that precisely fits a corresponding projection on another piece. It creates a strong and secure connection, similar to a mortise and tenon joint but with a wider, rectangular profile. The dado is typically cut across the grain of the wood, while the corresponding projection, called a "dado tongue," runs with the grain. This orientation enhances the joint's strength and stability.

Advantages of Dado Joints

Dado joints offer several advantages over other joinery methods:

  • Strength and Stability: The large surface area of the dado joint creates a strong, interlocking connection that distributes stress evenly, resulting in exceptional durability and resistance to racking and twisting.
  • Ease of Construction: Compared to other complex joints, dado joints are relatively straightforward to create, especially with the help of a dado stack or dado blade on a table saw.
  • Clean and Professional Look: The smooth, flush surfaces of a well-executed dado joint create a clean and professional appearance, enhancing the overall aesthetic appeal of your drawer construction.
  • Versatility: Dado joints are adaptable to various woodworking projects, including shelves, cabinets, and furniture frames, not just drawers.

Types of Dado Joints

There are different types of dado joints, each suited for specific applications and aesthetics:

Standard Dado Joint

The most common type, this dado joint is a simple, rectangular groove cut across the grain of the wood. It provides a solid, reliable connection and is easy to create.

Through Dado Joint

A through dado joint extends completely through the thickness of the wood, allowing for a more substantial connection. This type is particularly useful for applications where maximum strength is required, such as heavy-duty shelves or drawer boxes.

Blind Dado Joint

A blind dado joint only partially cuts through the wood, creating a hidden joint. This type is aesthetically appealing, as it avoids any visible grooves on the surface of the wood.

Double Dado Joint

This joint involves cutting two dados side-by-side, creating a channel for a double-thickness tongue. It offers increased strength and stability, making it suitable for heavier loads or demanding applications.

Tools and Techniques for Cutting Dado Joints

Cutting accurate and precise dado joints requires the right tools and techniques. Here are some essential tools and methods:

Table Saw with Dado Stack

A table saw equipped with a dado stack is the most common and versatile tool for cutting dado joints. A dado stack consists of two outer blades and one or more inner chipper blades, allowing you to create a wide range of dado widths. This setup provides precise cutting depth and a clean, smooth finish.

Dado Blade

A dado blade is a single, specialized blade designed for cutting dado joints. It features multiple teeth with a wider kerf than a standard saw blade. While not as versatile as a dado stack, it is a more affordable option for simple dado cuts.

Router with Dado Jig

A router, combined with a dado jig, can also be used to create dado joints. A dado jig is a template that guides the router, ensuring consistent and accurate cuts. This method is particularly suitable for cutting blind dado joints or complex dado shapes.

Hand-Cutting Dado Joints

While not as common, hand-cutting dado joints is possible using a chisel and a marking gauge. This method requires skill and patience, but it allows for exceptional accuracy and control.

Best Practices for Cutting Dado Joints

To ensure optimal results and create durable dado joints, follow these best practices:

  • Use Sharp Blades: Always ensure that your saw blades or router bits are sharp and in good condition for precise and clean cuts.
  • Proper Setup: When using a table saw or router, set up your tools correctly and adjust the depth of cut accurately to avoid cutting too deep or too shallow.
  • Measure Twice, Cut Once: Accurately measure and mark your wood before making any cuts. Double-check your measurements to ensure a perfect fit.
  • Support the Wood: When cutting dado joints, ensure that the wood is securely supported to prevent movement or vibration, which can lead to inaccurate cuts.
  • Use a Fence: A fence on your table saw or router will ensure straight and parallel dado cuts.
  • Clean Up: After cutting, remove any sawdust or chips to prevent them from interfering with the glue joint.

Tips for Building Drawers with Dado Joints

Here are some specific tips for building drawers using dado joints:

  • Choose the Right Wood: Select a stable wood species that won't warp or twist easily, such as maple, cherry, or oak.
  • Consider the Drawer Size: The size and weight of the drawer will determine the appropriate dado width and depth.
  • Create a Tight Fit: Ensure that the dado tongues fit snugly into the dados to create a strong connection.
  • Use Glue: Apply wood glue to the dado joint for a secure bond.
  • Clamping: Clamp the pieces together firmly while the glue dries.
  • Sand the Joints: After the glue has dried, sand the joints smooth for a professional finish.

Conclusion

Dado joints are a reliable and versatile joinery technique for building strong and aesthetically pleasing drawers. By understanding their advantages, different types, and best practices for cutting them, you can create high-quality drawers that will last for years to come. Whether you are a beginner or a seasoned woodworker, dado joints are a valuable tool to have in your arsenal.

Read More..

Budget-Friendly Wall Shelf Designs That Are Easy to Build and Sell

Budget-Friendly Wall Shelf Designs That Are Easy to Build and Sell

Budget-Friendly Wall Shelf Designs That Are Easy to Build and Sell

Looking to tap into the thriving DIY market and earn some extra cash? Building and selling wall shelves is a fantastic option. These versatile home accents are always in demand, and with a little creativity and resourcefulness, you can craft stunning pieces that are both budget-friendly and easy to build. This article will guide you through several practical designs and tips to help you get started on your DIY journey.

Choosing the Right Materials

The foundation of any successful DIY project lies in selecting the right materials. For budget-friendly wall shelves, consider these cost-effective options:

Wood

  • Pine: An affordable and readily available softwood, pine is easy to work with and takes paint or stain well.
  • Plywood: Offers a smooth surface and is a great choice for creating shelves with a modern look.
  • Reclaimed Wood: Adds a rustic charm and is a sustainable option. You can find reclaimed wood at salvage yards or even repurpose old furniture.

Metal

  • Steel Pipe: Industrial-style shelves can be created using steel pipes. These are durable and readily available at hardware stores.
  • Metal Brackets: Many styles of brackets are available in metal, offering a modern or rustic look depending on the finish.

Other Options

  • Rope: Create a unique and minimalist look with rope shelves. Use heavy-duty rope for sturdy support.
  • Concrete: For a modern and industrial vibe, consider making concrete shelves. Concrete molds are readily available online.

Easy and Budget-Friendly Wall Shelf Designs

Here are a few easy-to-build wall shelf designs that are perfect for beginners and won't break the bank:

Floating Shelf Design

  • Materials: Wood (pine or plywood), wood stain or paint, screws, drill, saw, measuring tape, level.
  • Instructions:
    1. Cut your wood to the desired shelf dimensions.
    2. Sand the wood smooth to ensure a clean finish.
    3. Stain or paint the wood as desired.
    4. Mark and pre-drill holes on the back of the shelf for mounting screws.
    5. Attach the shelf to the wall using appropriate screws.

Industrial Pipe Shelf Design

  • Materials: Steel pipe, steel brackets, wood (for shelves), screws, drill, saw, measuring tape, level.
  • Instructions:
    1. Cut the steel pipes to the desired length for the shelf supports.
    2. Cut the wood to the desired shelf dimensions.
    3. Attach the steel brackets to the wall using appropriate screws.
    4. Place the steel pipe supports onto the brackets.
    5. Place the wood shelves onto the steel pipe supports.

Rustic Ladder Shelf Design

  • Materials: Old ladder, wood planks, screws, drill, saw, measuring tape, level, sandpaper.
  • Instructions:
    1. Clean and sand the old ladder if necessary.
    2. Cut the wood planks to the desired shelf width and length.
    3. Attach the wood planks to the ladder rungs using screws.
    4. Secure the ladder to the wall for stability.

Simple Triangle Shelf Design

  • Materials: Wood, wood stain or paint, screws, drill, saw, measuring tape, level.
  • Instructions:
    1. Cut two triangles out of wood to serve as the shelf supports.
    2. Cut a rectangular piece of wood for the shelf itself.
    3. Attach the triangle supports to the wall using screws.
    4. Place the shelf on top of the supports.

Tips for Building and Selling Your Wall Shelves

Here are some key tips to ensure your DIY wall shelf venture is successful:

Focus on Quality and Craftsmanship

Use quality materials and take pride in your work. Smooth edges, precise cuts, and a well-finished product will make your shelves stand out.

Explore a Range of Styles

Offer different designs and sizes to appeal to a wider customer base. Think about contemporary, rustic, minimalist, and industrial styles.

Create a Strong Brand Identity

Develop a unique brand name and logo to make your shelves easily recognizable. Consider creating a website or social media presence to showcase your work.

Offer Competitive Pricing

Research pricing for similar products in your area to ensure your prices are competitive. Remember to factor in the cost of materials, your labor, and any overhead expenses.

Market Your Shelves Effectively

Utilize online platforms like Etsy, Facebook Marketplace, and Craigslist to reach a wider audience. Consider participating in local craft fairs or flea markets to showcase your work in person.

Provide Excellent Customer Service

Respond to inquiries promptly and offer clear communication about lead times and shipping. Positive reviews and word-of-mouth recommendations are crucial for success.

Conclusion

Building and selling DIY wall shelves is a rewarding venture that can be both profitable and enjoyable. By choosing budget-friendly materials, mastering simple designs, and focusing on quality and marketing, you can create a thriving business selling unique and beautiful home accents. So, unleash your creativity, pick up your tools, and start turning your DIY passion into a successful side hustle!

Read More..

Tuesday, November 19, 2024

Modern Coffee Tables with Clean Lines and Geometric Designs That Sell Quickly

Modern Coffee Tables with Clean Lines and Geometric Designs That Sell Quickly

Modern Coffee Tables with Clean Lines and Geometric Designs That Sell Quickly

In the world of interior design, coffee tables are more than just functional furniture; they are focal points that set the tone for the entire living space. Modern coffee tables, with their clean lines and geometric designs, have become a coveted choice for homeowners seeking to infuse their homes with a sense of sophistication and style. These tables not only enhance aesthetics but also possess a timeless quality that makes them enduring investments. But with countless options available, how do you choose the modern coffee tables that are sure to sell quickly? This article delves into the key elements of modern design that make coffee tables instantly desirable.

The Allure of Clean Lines and Geometric Shapes

Modern design thrives on simplicity and clarity. This translates to coffee tables characterized by clean lines and geometric shapes. The absence of elaborate carvings or unnecessary adornments creates a sense of visual harmony and sophistication. Geometric designs, such as squares, circles, and triangles, are not only visually appealing but also add a touch of architectural elegance to the space.

Benefits of Clean Lines and Geometric Shapes

  • Visual Clarity: Clean lines and geometric shapes create a sense of order and visual clarity. The absence of clutter allows the eye to easily navigate the space and appreciate the furniture's form.
  • Timeless Appeal: Unlike trends that come and go, modern coffee tables with clean lines and geometric designs retain their appeal over time. They seamlessly blend with various interior styles, making them versatile and enduring investments.
  • Versatility: The simplicity of modern coffee tables allows them to work well in a variety of settings. Whether you have a minimalist, contemporary, or eclectic home, a clean-lined coffee table can easily integrate into the existing decor.

Material Choices That Elevate Modern Design

The materials used in modern coffee tables play a crucial role in defining their overall aesthetic and functionality. Modern design often favors materials that are both aesthetically pleasing and durable. Popular material choices include:

  • Wood: Wood, especially in its natural form, is a staple of modern design. Its warmth and organic texture create a comforting atmosphere. Popular wood choices include walnut, oak, and maple, known for their rich grain patterns and natural beauty.
  • Metal: Metal is another popular material for modern coffee tables. Steel, aluminum, and brass add a sleek and industrial feel to the space. These metals are durable and can be finished in various ways to create different looks.
  • Glass: Glass is a versatile material that adds a touch of sophistication and transparency. It creates a sense of openness and allows light to pass through, making the room feel larger. Glass coffee tables are particularly popular in contemporary spaces.
  • Stone: Stone, such as marble or granite, exudes a sense of luxury and permanence. These materials are naturally resistant to scratches and stains, making them ideal for high-traffic areas.

The Power of Functionality

While aesthetics are crucial, functionality is equally important. Modern coffee tables are designed to be both stylish and practical. Look for features that enhance usability and make the table a truly valuable piece of furniture. Consider:

  • Storage: Many modern coffee tables incorporate hidden storage compartments or shelves. These provide a convenient way to tidy away remotes, magazines, or other items, keeping the living room clutter-free.
  • Adjustable Height: Some modern coffee tables offer adjustable heights, making them more versatile. This allows you to easily change the height of the table to suit your needs or to complement other furniture pieces.
  • Durability: Look for materials that are resistant to scratches, stains, and water damage. This ensures that your coffee table remains in good condition for years to come.

Conclusion: Modern Coffee Tables That Sell Quickly

Modern coffee tables with clean lines, geometric designs, and functional features are a surefire way to elevate the style and functionality of any living room. These pieces not only provide a practical surface for drinks and snacks but also serve as striking focal points that create a sense of sophistication and timeless appeal. By carefully considering the elements of modern design and functionality, you can choose coffee tables that are not only aesthetically pleasing but also make a wise investment.

Read More..

Monday, November 18, 2024

Key Rack Projects That Will Add Style and Function to Any Home

Key Rack Projects That Will Add Style and Function to Any Home

Key Rack Projects That Will Add Style and Function to Any Home

A key rack is more than just a place to hang your keys. It’s a functional piece of décor that can add style and organization to any home. Whether you prefer a sleek and modern design or a rustic and charming aesthetic, there’s a key rack out there that's perfect for you. And the best part? Many key rack projects are surprisingly easy to DIY, allowing you to personalize your home with your own unique touch.

DIY Key Rack Ideas

The possibilities for creating a DIY key rack are endless. Here are some ideas to inspire your next project:

1. Repurposed Wood Key Rack

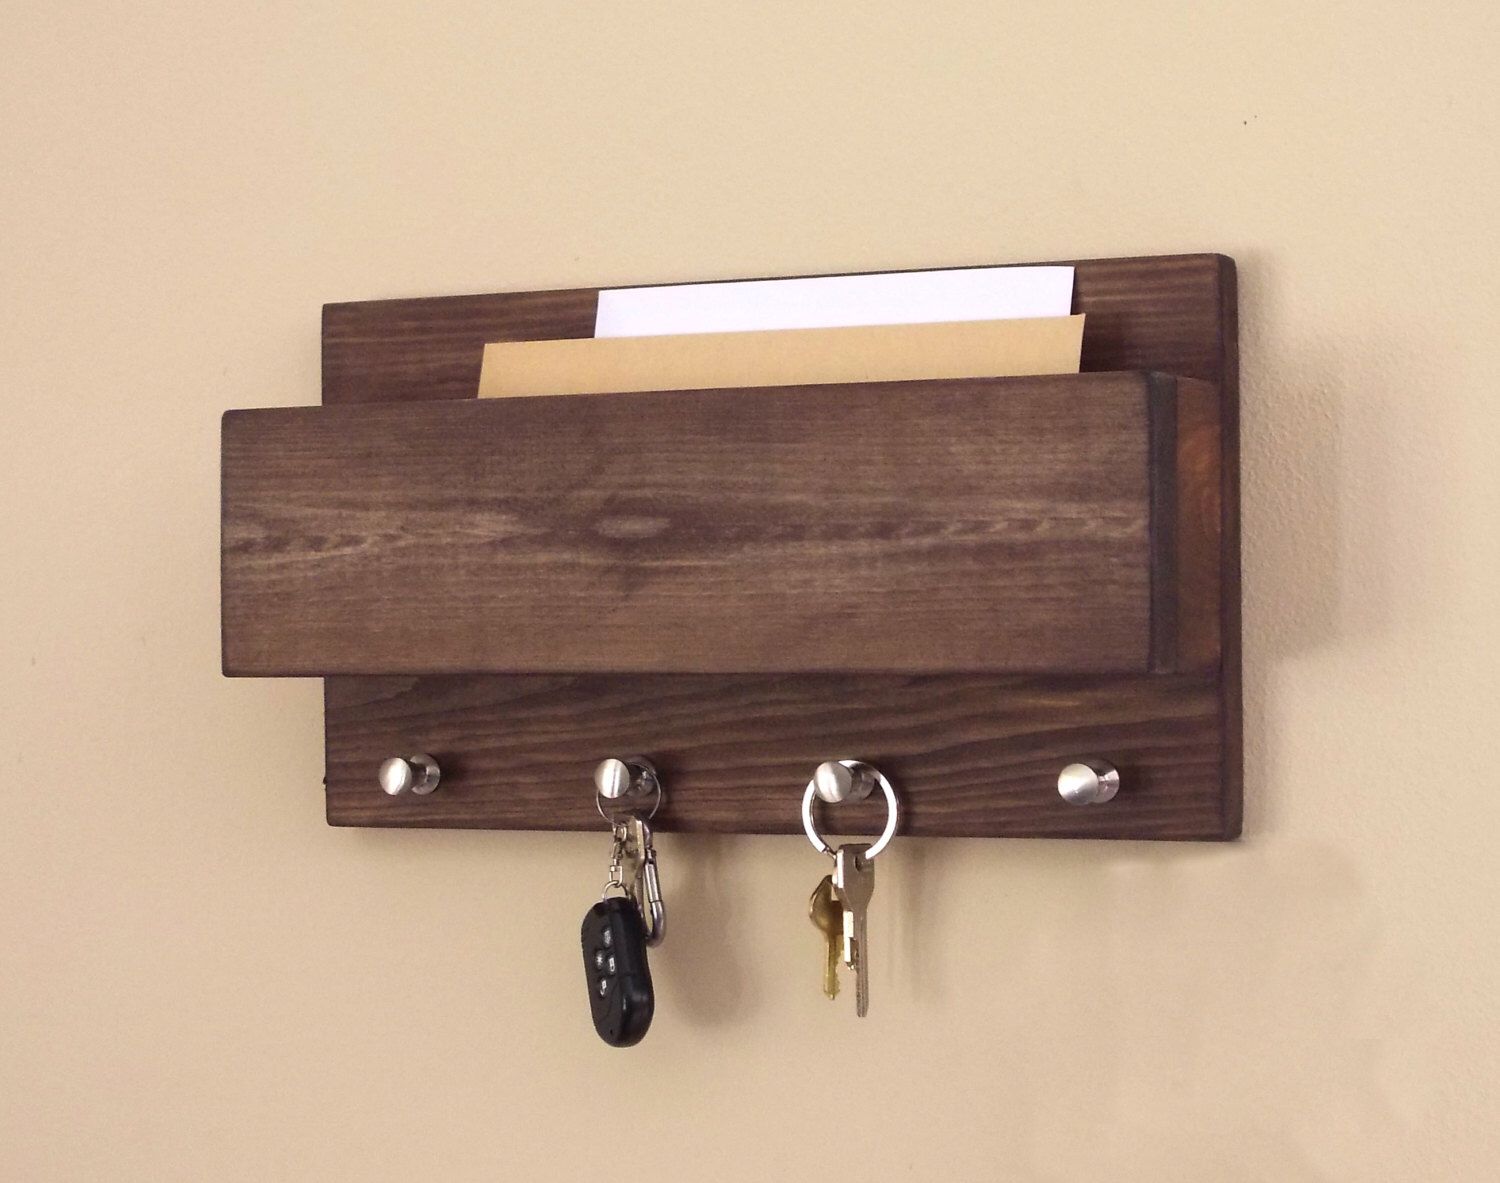
Give old wood a new life by transforming it into a stylish key rack. Use reclaimed wood planks, pallet boards, or even an old door. Sand the wood smooth, stain or paint it to your liking, and attach hooks or knobs. You can even add a small shelf for other small items like mail or sunglasses.

Here’s a simple guide to get started:

  1. Choose a piece of wood that’s the right size and shape for your space.
  2. Sand the wood and apply a sealant or stain to protect it.
  3. Drill holes for your hooks or knobs, making sure they are spaced evenly.
  4. Screw in the hooks or knobs.
  5. Hang your new key rack on the wall.

2. Metal Pipe Key Rack

Industrial chic meets practicality with a metal pipe key rack. This modern design is simple yet striking. You can use copper, black iron, or galvanized pipe, and add accents like leather straps or wooden shelves for a personalized touch. You can find all the necessary materials at your local hardware store.

Here’s a breakdown of the steps involved:

  1. Cut the pipe to the desired length.
  2. Attach the pipe to the wall using brackets or flanges.
  3. Add hooks or knobs to the pipe.
  4. Hang your key rack on the wall.

3. Decorative Tile Key Rack

Add a touch of whimsy and color to your entryway with a decorative tile key rack. Choose tiles that reflect your style, from classic subway tiles to vibrant Moroccan patterns. You can simply adhere the tiles to a wooden board or create a more elaborate mosaic design.

Here’s how to create a decorative tile key rack:

  1. Choose your tiles and design.
  2. Cut the tiles to fit your design if necessary.
  3. Adhere the tiles to a wooden board using tile adhesive.
  4. Allow the adhesive to dry completely before adding hooks or knobs.
  5. Hang your key rack on the wall.

4. Branch Key Rack

Embrace the beauty of nature by incorporating a branch into your key rack design. Find a sturdy branch with unique curves and character. Clean the branch thoroughly, sand it smooth, and add hooks or knobs. You can leave the branch in its natural state or paint it for a bolder look.

Here’s a guide for making a branch key rack:

  1. Choose a branch that’s the right size and shape for your space.
  2. Clean and sand the branch thoroughly.
  3. Attach hooks or knobs to the branch using screws or nails.
  4. Mount the branch to the wall using brackets or hooks.

Key Rack Styles and Trends

Beyond the DIY options, there are numerous pre-made key racks available in various styles. Here are some popular trends:

1. Minimalist Key Racks

For those who prefer clean lines and simple designs, minimalist key racks are a perfect choice. These often feature geometric shapes, sleek metals, and understated colors. Minimalist key racks can be found in various materials, from wood and metal to acrylic and ceramics.

2. Rustic Key Racks

Embrace the warmth and charm of rustic style with a key rack made from natural materials like wood, leather, or metal. These key racks often feature distressed finishes, knots, and other natural imperfections that contribute to their unique character. Rustic key racks are perfect for adding a touch of farmhouse or cabin aesthetic to your home.

3. Farmhouse Key Racks

Farmhouse style is all about creating a cozy and inviting atmosphere, and a key rack can be a great way to incorporate this aesthetic into your entryway. Farmhouse key racks are often made from wood and feature simple designs with rustic elements, such as galvanized metal accents or reclaimed wood.

4. Industrial Key Racks

If you’re drawn to the industrial aesthetic, a key rack made from metal pipes, reclaimed wood, or other industrial materials is a great option. These key racks often feature exposed hardware, raw finishes, and bold accents. Industrial key racks can add a touch of urban edge to any space.

Choosing the Right Key Rack for Your Home

When selecting a key rack for your home, consider the following factors:

  • Style: Choose a key rack that complements your home’s overall design style.
  • Size: Select a key rack that is appropriate for the space where you plan to hang it.
  • Material: Choose a key rack made from a material that is durable and easy to clean.
  • Functionality: Consider the number of hooks you need and whether you want additional features, such as a shelf or mail organizer.
  • Budget: Key racks come in a wide range of prices, so set a budget before you start shopping.

Conclusion

A key rack is a practical and stylish addition to any home. It provides a designated spot for your keys, helping you stay organized and prevent lost keys. Whether you choose to create a DIY key rack or purchase one from a store, there are countless options available to suit your taste and budget. So get creative and choose a key rack that will enhance the functionality and aesthetics of your entryway.

Read More..

Wednesday, November 13, 2024

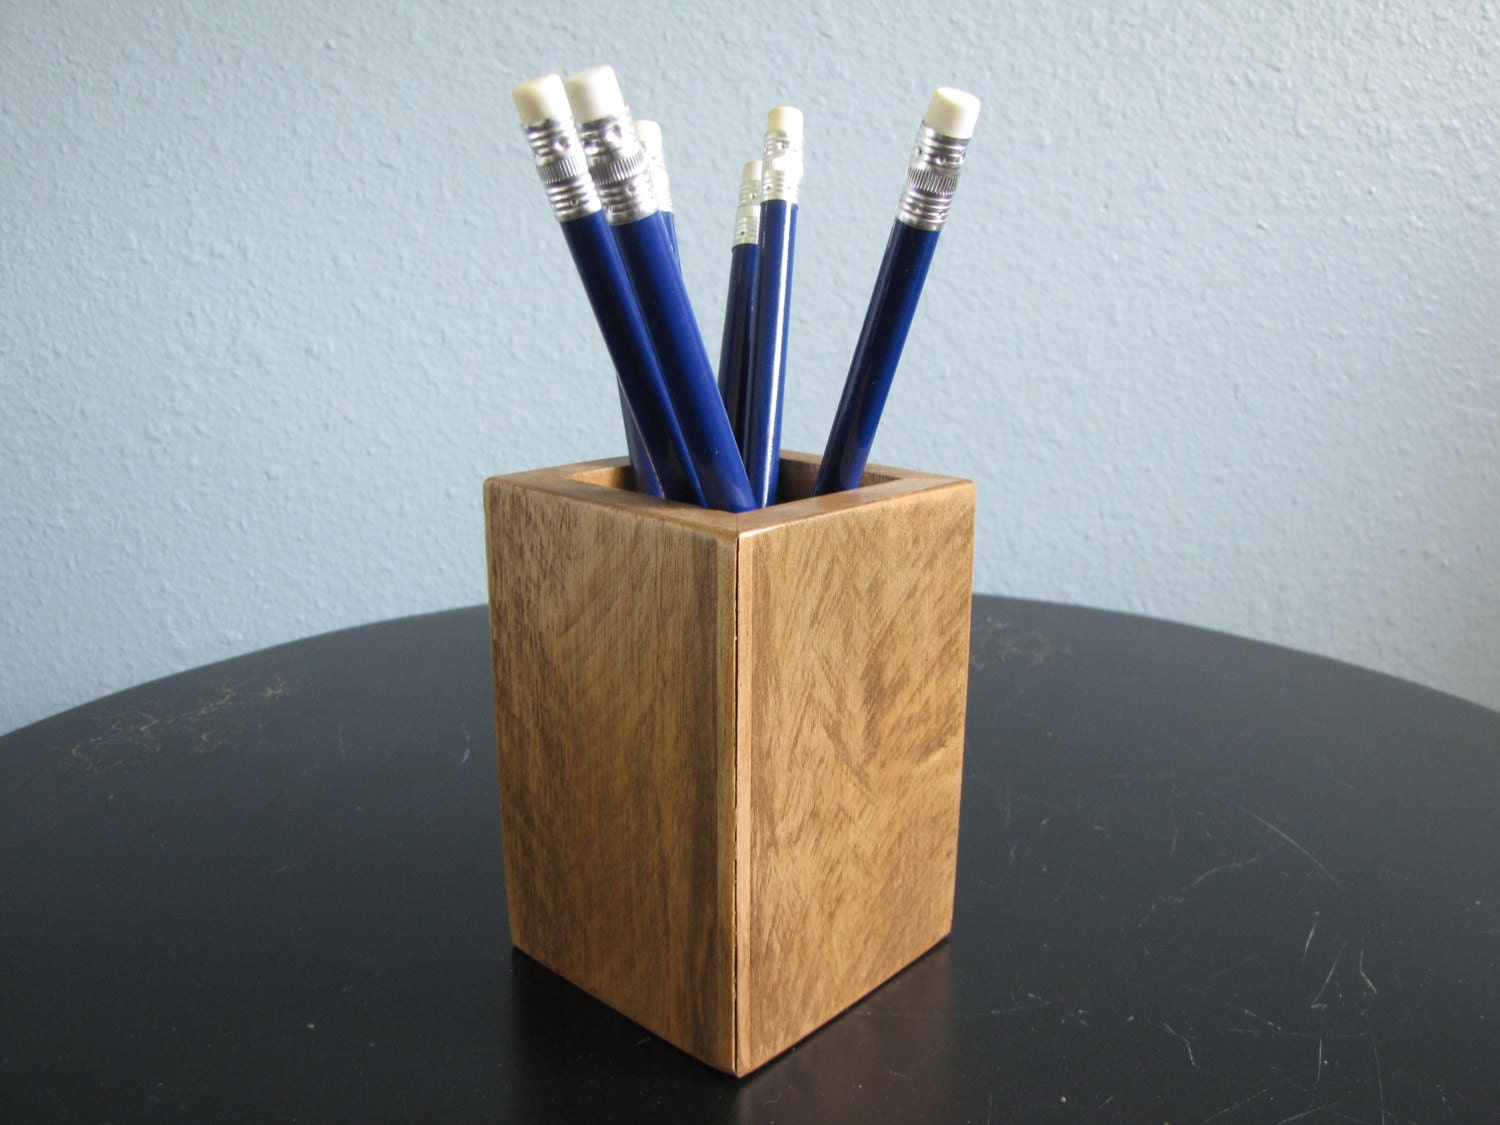
Stylish Wooden Pencil Holders with Slots for Pens, Markers, and More

Stylish Wooden Pencil Holders with Slots for Pens, Markers, and More

Stylish Wooden Pencil Holders with Slots for Pens, Markers, and More

In the realm of home organization and workspace aesthetics, pencil holders have transcended their purely functional purpose, evolving into stylish accessories that enhance the visual appeal of any desk or study space. Among the various materials employed in their construction, wood stands out as a timeless and elegant choice, offering a warm and inviting ambiance while seamlessly blending into diverse décor styles. This article explores the world of stylish wooden pencil holders, delving into their unique features, the advantages they offer, and how to choose the perfect one to elevate your workspace.

The Allure of Wooden Pencil Holders

The allure of wooden pencil holders lies in their inherent ability to blend functionality with aesthetic appeal. The natural grain patterns and warm tones of wood create a sense of sophistication and timelessness, adding a touch of elegance to any desk or workspace. Moreover, the tactile nature of wood provides a pleasing sensory experience, making it a joy to interact with on a daily basis.

Natural Beauty and Versatility

Wooden pencil holders come in a wide array of wood species, each boasting its own unique characteristics. From the rich, dark hues of walnut and mahogany to the lighter, more delicate tones of maple and cherry, the choice of wood allows for personalization and a perfect match to your existing décor. Whether you prefer a rustic, farmhouse aesthetic or a contemporary, minimalist look, there's a wooden pencil holder that complements your style.

Durability and Longevity

Beyond aesthetics, wooden pencil holders are known for their exceptional durability. Unlike plastic or metal holders that can easily crack or dent, well-crafted wooden holders are built to last, resisting scratches and wear and tear. With proper care, a wooden pencil holder can become a cherished heirloom, passed down through generations.

Features of Stylish Wooden Pencil Holders

Stylish wooden pencil holders are not merely functional containers for writing instruments. They often feature intricate designs, unique shapes, and specialized compartments that enhance their practicality and aesthetic appeal.

Compartmentalization for Organization

Many wooden pencil holders incorporate multiple compartments, allowing for the efficient organization of various writing tools. Separate slots for pens, pencils, markers, and highlighters ensure that everything has its designated place, keeping your workspace tidy and clutter-free.

Integrated Drawers and Storage

Some wooden pencil holders feature integrated drawers or hidden storage compartments. These provide a convenient way to store additional writing supplies, such as erasers, sharpeners, or even small office accessories. Such integrated storage solutions contribute to a streamlined and organized workspace.

Customizable Design Elements

To further personalize your workspace, look for wooden pencil holders that offer customizable design elements. Some holders feature engraved names, initials, or inspirational quotes, while others allow for the addition of decorative elements like brass accents or leather straps.

Benefits of Using Wooden Pencil Holders

Beyond aesthetics, wooden pencil holders offer a range of practical benefits that contribute to a more efficient and enjoyable workspace.

Enhanced Organization

The compartmentalization and storage features of wooden pencil holders promote a more organized workspace. By keeping writing tools separate and easily accessible, you can minimize time spent searching for specific items, leading to increased productivity.

Improved Desk Aesthetics

Wooden pencil holders elevate the visual appeal of your desk, creating a more inviting and inspiring atmosphere. The warmth and elegance of wood can foster a sense of calm and focus, enhancing your overall workspace experience.

Sustainability and Eco-Friendliness

Choosing a wooden pencil holder supports sustainable practices. Wood is a renewable resource, and responsible sourcing ensures that the wood used in your holder is ethically harvested. By opting for a wooden pencil holder, you contribute to environmental consciousness.

Choosing the Right Wooden Pencil Holder

Selecting the perfect wooden pencil holder involves considering several factors that align with your individual needs and preferences.

Size and Capacity

The size and capacity of the holder should accommodate your writing tool collection. Consider the number of pens, pencils, markers, and other items you need to store, and choose a holder that provides ample space.

Style and Design

Select a holder that complements the overall style of your desk and workspace. If your desk has a modern, minimalist aesthetic, opt for a sleek and streamlined holder. For a more traditional or rustic look, choose a holder with intricate carvings or natural finishes.

Material and Wood Species

The choice of wood species affects the holder's color, grain pattern, and durability. Consider the specific characteristics of each wood type and choose one that resonates with your preferences.

Price and Value

Wooden pencil holders come in a wide range of prices, depending on the materials used, craftsmanship, and design complexity. Set a budget and consider the overall value the holder provides in terms of both functionality and aesthetics.

Conclusion

Stylish wooden pencil holders elevate the functionality and aesthetics of any workspace. They offer a blend of natural beauty, durability, and practical organization, making them a thoughtful investment for anyone seeking to enhance their desk environment. By considering the size, style, material, and price factors, you can choose the perfect wooden pencil holder that aligns with your needs and preferences, transforming your desk into a sanctuary of organization and inspiration.

Read More..

How to Make Wooden Lawn Chairs with Custom Finishes for Every Style

How to Make Wooden Lawn Chairs with Custom Finishes for Every Style

How to Make Wooden Lawn Chairs with Custom Finishes for Every Style

Crafting your own wooden lawn chairs is a rewarding project that allows you to personalize your outdoor space. With a bit of woodworking skill and creativity, you can create comfortable and stylish chairs that perfectly complement your garden, patio, or porch. This comprehensive guide will walk you through the entire process, from choosing materials to applying custom finishes that cater to your desired aesthetic.

Step 1: Planning and Design

Before you begin, it's crucial to plan your project thoroughly.

1.1 Choose Your Style

Consider the overall design of your outdoor space and select a chair style that complements it. Popular options include:

  • Adirondack chairs: Classic and comfortable, with a signature sloping backrest and wide armrests.
  • Folding chairs: Space-saving and portable, ideal for smaller areas or gatherings.
  • Lounge chairs: Low and wide, designed for relaxing and lounging.
  • Traditional garden chairs: Elegant and ornate, often featuring intricate carvings and details.

1.2 Determine Dimensions

Once you have chosen a style, measure your desired dimensions. You can find free plans online or create your own based on your preferences. Make sure to consider your height, comfort level, and the intended use of the chairs.

1.3 Select Materials

The choice of wood significantly influences the strength, durability, and appearance of your chairs. Consider these factors:

  • Hardwoods: Offer greater strength, durability, and resistance to weathering. Examples include oak, cedar, and teak.
  • Softwoods: More affordable and easier to work with, but require more care to prevent warping and damage. Examples include pine, fir, and spruce.
  • Treated lumber: Offers protection against moisture and pests, making it suitable for outdoor use. However, it may contain chemicals that are not ideal for all applications.

Step 2: Cutting and Assembling the Chair

Once you have your materials ready, follow these steps to construct your chairs:

2.1 Cutting Wood

Use a table saw, circular saw, or miter saw to accurately cut the wood according to your plan. Ensure clean, precise cuts for a sturdy and attractive final product.

2.2 Joining Pieces

Join the cut pieces using various methods, such as:

  • Mortise and tenon joints: Strong and durable, but require more skill and precision.
  • Pocket hole joints: Easy to assemble, offering good strength for most applications.
  • Dowel joints: Simple and effective, particularly for decorative purposes.
  • Gluing and screwing: A common method for joining wood, ensuring a secure bond.

2.3 Assembling the Chair

Carefully assemble the pieces according to your plan, making sure everything aligns properly. Use clamps to secure the joints while the glue dries.

Step 3: Finishing Touches

Once the chair is assembled, it's time to add the finishing touches to enhance its beauty and durability.

3.1 Sanding

Sand the chair with progressively finer grits of sandpaper to smooth out any rough edges and create a smooth surface for painting or staining.

3.2 Staining

Staining adds color and depth to the wood, enhancing its natural beauty. Choose a stain color that complements your desired aesthetic and apply it evenly to the entire chair.

3.3 Painting

Painting provides a more durable and long-lasting finish, protecting the wood from weather damage and allowing you to personalize the chair with a variety of colors.

  • Oil-based paints: Offer excellent durability and weather resistance, but require more time to dry.
  • Latex paints: Easier to clean up and dry faster than oil-based paints, but may not be as durable.

3.4 Sealing

After staining or painting, apply a sealer to protect the finish from water and UV rays. Popular options include:

  • Polyurethane: Offers excellent protection against moisture and UV rays, but can be glossy.
  • Varnish: Provides a more natural look and finish, but may not offer as much protection as polyurethane.
  • Lacquer: Durable and provides a high-gloss finish, but can be more challenging to apply.

Custom Finishes for Every Style

Here are some ideas for custom finishes that cater to different styles:

4.1 Rustic Charm

Create a rustic look with a natural wood finish, highlighting the wood's grain and imperfections. Use a clear sealant to enhance the natural beauty of the wood.

4.2 Modern Minimalism

Embrace a clean and contemporary aesthetic with a simple, white or gray paint finish. Avoid embellishments and maintain a minimalist approach.

4.3 Coastal Elegance

Channel a coastal vibe with light blue or green paint, paired with white accents. Consider adding nautical details, such as rope handles or seashell motifs.

4.4 Tropical Paradise

Transport yourself to a tropical paradise with vibrant colors, such as turquoise, yellow, or orange. Add tropical motifs, such as palm leaves or flowers, for a more whimsical feel.

Step 4: Finishing Touches

After the finish has cured, add any additional details to enhance the chairs' functionality and style.

5.1 Cushions

Add cushions for extra comfort and style. Choose fabric colors and patterns that complement the chair's finish and your overall outdoor decor.

5.2 Accessories

Accessorize your chairs with throw blankets, pillows, and decorative items to create a cozy and inviting atmosphere.

Conclusion

Building your own wooden lawn chairs with custom finishes allows you to create unique and personalized furniture pieces that perfectly complement your outdoor space. By carefully planning, choosing the right materials, and applying a touch of creativity, you can craft chairs that are both beautiful and functional. Enjoy the satisfaction of creating something special for your outdoor oasis.

Read More..

How to Build Floating Shelves: A Step-by-Step Guide

How to Build Floating Shelves: A Step-by-Step Guide

How to Build Floating Shelves: A Step-by-Step Guide

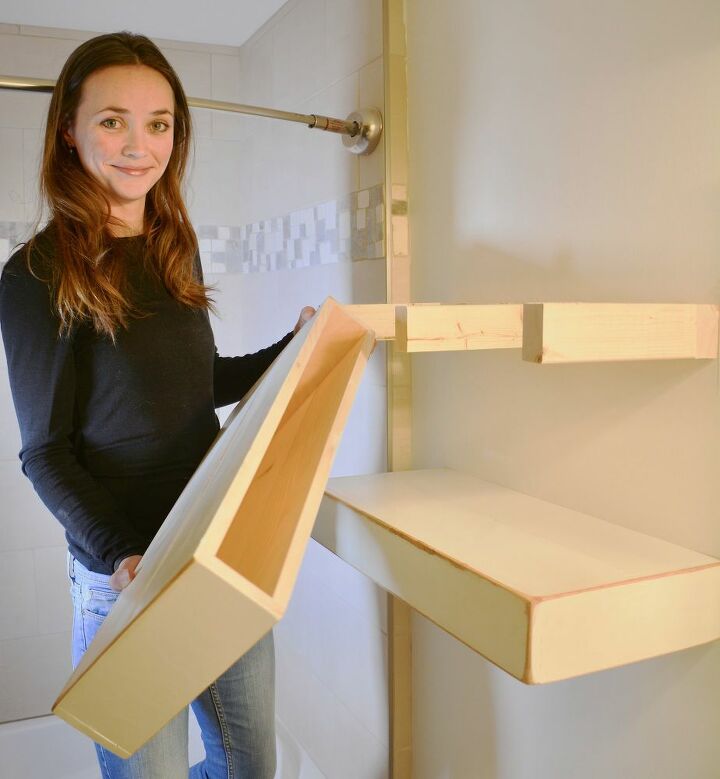
Floating shelves offer a modern and stylish way to display your belongings while maximizing space. They create a minimalist aesthetic and can be easily adapted to any room. This step-by-step guide will walk you through the process of constructing your own floating shelves, empowering you to personalize your home decor.

Materials Needed

Before you begin, gather the necessary materials to ensure a smooth construction process.

Wood

  • Shelf Boards: Choose a wood type that complements your desired style and is sturdy enough to support your intended items. Popular options include pine, maple, oak, and plywood.
  • Shelf Brackets: These hidden brackets are crucial for supporting the shelf. They come in various materials (metal, wood) and styles (L-shaped, triangular). Select brackets that match the width and weight capacity of your shelf board.

Tools

  • Measuring Tape: Precise measurements are essential for accurate cuts and installation.
  • Level: Ensures that your shelves are installed evenly and securely.
  • Pencil: For marking the shelf board and wall for cutting and installation.
  • Circular Saw or Jigsaw: For cutting the shelf board to size. A jigsaw is more versatile for intricate cuts.
  • Drill: For drilling pilot holes in the shelf boards and wall for installing screws.
  • Screwdriver or Drill Driver: For attaching the brackets and securing the shelf to the wall.
  • Safety Glasses and Ear Protection: Always prioritize safety when working with power tools.
  • Sandpaper: For smoothing any rough edges on the shelf board after cutting.
  • Wood Glue: (Optional) To strengthen the connection between the brackets and shelf board.
  • Finishing Products: (Optional) Paint, stain, or sealant to protect and enhance the look of your shelves.

Step 1: Planning and Measurement

Start by determining the dimensions of your floating shelves and the location on the wall where you wish to install them.

  1. Decide on Shelf Dimensions: Consider the space available, the weight of the items you'll display, and the desired aesthetic. Measure the width, depth, and number of shelves you require.
  2. Choose Shelf Placement: Carefully select the wall location for your shelves. Ensure it's a sturdy wall and consider any electrical outlets or plumbing fixtures that may interfere with installation. Use a level to mark the desired height on the wall.
  3. Determine Bracket Spacing: The spacing of the brackets depends on the shelf's length and the weight it needs to support. Consult the bracket manufacturer's recommendations or use a general rule of thumb: for a 30-inch shelf, place brackets approximately every 12 inches.
  4. Mark Bracket Positions: Once you've determined the bracket spacing, use a level to mark the bracket positions on the wall, ensuring they are even and at the desired height.

Step 2: Cutting and Sanding

Prepare your shelf boards for installation by cutting them to size and sanding them for a smooth finish.

  1. Cut Shelf Boards: Use a circular saw or jigsaw to cut your shelf boards to the desired width. Remember to account for the thickness of the shelf boards when calculating the overall width of your shelf. Make sure your cuts are precise and straight.
  2. Sand Edges: Smooth any rough edges or imperfections on the shelf boards using sandpaper. This will create a clean and professional look.

Step 3: Pre-Drilling and Installing Brackets

Pre-drilling pilot holes ensures a clean and secure installation of the brackets.

  1. Pre-Drill Pilot Holes: Use a drill with a bit slightly smaller than the screws provided with your brackets. Pre-drill pilot holes into the wall at the marked bracket locations. This prevents splitting the wall when driving screws.
  2. Attach Brackets: Place the brackets on the wall at the pre-drilled holes. Secure them with screws using a screwdriver or drill driver. Make sure the brackets are firmly attached to the wall.

Step 4: Securing Shelves

This step involves attaching the shelf boards to the installed brackets.

  1. Position Shelves: Carefully place the shelf boards on the brackets, ensuring they are level and centered.
  2. Secure Shelves: Attach the shelf boards to the brackets using the appropriate screws. Depending on the bracket design, you may need to drive screws through the shelf board into the bracket, or into pre-drilled holes on the underside of the shelf.
  3. Check Stability: After attaching the shelves, double-check their stability by gently pushing on them. Ensure they are secure and won't budge.

Step 5: Finishing Touches

Enhance the look and longevity of your floating shelves with finishing touches.

  1. Finishing: If desired, apply a paint, stain, or sealant to your shelves. This step will protect the wood from damage and provide a desired aesthetic. Allow the finish to dry completely before loading your shelves with items.
  2. Decorate and Display: Arrange your favorite items, books, or decor on your newly built floating shelves, creating a personalized and inviting space.

Tips for Success

  • Measure Twice, Cut Once: Accuracy is paramount in woodworking. Take precise measurements to ensure your shelves fit perfectly and the brackets are evenly spaced.
  • Choose the Right Screws: Select screws that are long enough to securely fasten the brackets to the wall and the shelves to the brackets. Use screws specifically designed for drywall or the type of wall material you have.
  • Level, Level, Level: Use a level throughout the construction process, especially when marking bracket positions and attaching shelves. This will guarantee that your shelves are straight and visually appealing.
  • Test Weight Capacity: Before placing heavy items on your shelves, consider their weight capacity. Place a few books or other items on the shelves to test their stability and make sure they can handle the weight of your belongings.
  • Clean Up: After finishing your shelves, clean up any sawdust or debris to maintain a tidy work area and keep your home dust-free.

Conclusion

By following these steps, you can confidently construct your own floating shelves. With a bit of patience and careful attention to detail, you'll create a visually appealing and practical storage solution that enhances the aesthetics and functionality of your home. Feel free to experiment with different wood types, finishes, and placement to personalize your project and create a truly unique display.

Read More..

Key Holder Designs with Unique Features That Will Stand Out

Key Holder Designs with Unique Features That Will Stand Out

Key Holder Designs That Will Make You Say "Wow!"

Tired of the same old boring key holders? We all need a place to keep our keys, but why not make it fun and unique? Let's face it, key holders aren't just for keeping your keys organized. They're also a chance to show off your style and personality. So, get ready to ditch the ordinary and embrace the extraordinary!

Beyond the Basic: Key Holder Features to Impress

Gone are the days of plain, plastic key holders. Today's key holder designs are all about functionality, innovation, and a touch of whimsy. Here are some unique features to look for:

1. The Power of Personalization

Let's be real, personalization is the name of the game. Whether it's engraved with your initials, a meaningful quote, or even a quirky design, adding a personal touch makes a key holder truly yours. Think about it: wouldn't you love a key holder that reflects your personality?

2. Beyond the Walls: Magnetic Key Holders

Magnetic key holders are a game-changer for minimalist spaces. They can be easily mounted on any metallic surface, freeing up precious wall space. Plus, they're super convenient. Just wave your keys near the magnet, and they'll be secure in a flash. Imagine, no more struggling with hooks!

3. Clever Combinations: Key Holder + ...

Think outside the box! Key holders can be so much more than just a place to hang your keys. They can be incorporated into other household items. Imagine a key holder that's also a charging station, a hidden compartment for valuables, or a stylish coat rack. Talk about multitasking!

Unique Key Holder Designs That Stand Out

Now that you're equipped with some key features to look for, let's dive into some truly inspiring designs that will make you say "Wow!":

1. The Wall Art Key Holder

Who says key holders can't be art? These designs are a feast for the eyes, transforming a simple key holder into a statement piece. Think intricate metalwork, colorful mosaics, or even a beautiful piece of driftwood. Let your keys be the focal point of your entryway.

2. The Minimalist Masterpiece

Less is more, right? Minimalist key holders are all about sleek lines and clean design. They're perfect for modern homes and create a sense of calm in a busy space. Think simple geometric shapes, natural materials like wood or stone, or a minimalist metallic design.

3. The Quirky and Charming

If you love a touch of whimsy, there are key holders out there just for you! Think cute animal shapes, playful patterns, or even quirky characters. These designs will bring a smile to your face every time you reach for your keys. Just remember, don't be afraid to let your personality shine!

4. The Functional and Stylish

Who says you can't have it all? Some key holders are both incredibly functional and incredibly stylish. Think key holders with built-in mail slots, hooks for bags, or even small shelves for your phone or wallet. These designs make your life easier and look great while doing it.

Choosing the Right Key Holder for You

With so many amazing options, it's easy to get overwhelmed. Don't worry, there's a perfect key holder out there for everyone. Here are some tips to help you narrow down your choices:

  • Consider your style: Are you drawn to modern, minimalist designs? Or do you prefer something more traditional? Your personal style is a great starting point.
  • Think about your space: Do you have limited wall space? Or are you looking for a statement piece to make a bold impact? The size and shape of your key holder should complement your surroundings.
  • Don't forget functionality: How many keys do you need to store? Do you need additional features like hooks or shelves? Make sure your key holder meets your practical needs.
  • Get creative: Don't be afraid to experiment with different materials and designs. You might be surprised at what you find! The key holder should be a reflection of your unique personality.
  • The Key to a Happy Home

    Key holders are more than just practical necessities. They're little touches that can make your home feel more welcoming and organized. So, take your time, browse through the vast array of designs, and find the one that speaks to your soul. Your keys will thank you, and so will your style!

    Read More..

    Elegant Wooden Wine Racks for a Home Bar

    Elegant Wooden Wine Racks for a Home Bar

    Elegant Wooden Wine Racks for a Home Bar

    Imagine this: you're hosting a dinner party, your guests are mingling, and the conversation is flowing as smoothly as the wine. You reach for a bottle from your meticulously curated collection, displayed with pride on a stunning wooden wine rack. It's not just storage, it's a statement piece, a testament to your refined taste and love for the finer things in life. A well-chosen wine rack can be the centerpiece of your home bar, adding warmth, sophistication, and a touch of rustic charm.

    But with so many options available, finding the perfect wine rack for your needs can feel overwhelming. Fear not! We're diving deep into the world of elegant wooden wine racks to help you find the one that complements your style and space perfectly.

    Why Choose a Wooden Wine Rack?

    Beyond aesthetics, wooden wine racks offer a plethora of practical benefits. Here's why they reign supreme:

    • Durability: Wood is naturally sturdy and long-lasting, ensuring your rack will withstand the test of time and countless wine bottles.
    • Natural Beauty: The warmth and natural grain of wood lend a touch of rustic elegance to any space. It pairs beautifully with various decor styles, from modern to farmhouse.
    • Versatility: Wood can be stained or painted to match your existing furniture, making it seamlessly integrate into your home bar. You can find designs that range from minimalist to ornate.
    • Environmental Friendliness: Choosing sustainable, responsibly sourced wood is a way to make an eco-conscious decision.

    Types of Wooden Wine Racks

    The world of wooden wine racks is vast and varied, offering a range of styles to suit every taste and space.

    Wall-Mounted Wine Racks

    These are perfect for small spaces or those looking to maximize floor space. They come in various sizes and configurations, from compact single-bottle holders to expansive multi-tiered designs. Wall-mounted racks are easy to install and can even be arranged creatively to form a unique wall display.

    Freestanding Wine Racks

    For those who want a more substantial piece, freestanding wine racks offer a robust solution. They can be crafted from a variety of wood types, including oak, cherry, walnut, and mahogany, and can be styled to complement your home bar aesthetic. Some come with additional storage options, such as shelves or drawers, to hold glasses, bar tools, or even other spirits.

    Corner Wine Racks

    If you're short on space, corner wine racks are an excellent choice. They make use of otherwise underutilized areas and can add a touch of architectural interest to your home bar. They can be designed to fit snugly in the corner or offer a more open, angled configuration.

    Wine Rack Kits

    Looking for a DIY project? Wine rack kits offer a fun and affordable way to build your own unique storage solution. They come in various styles and sizes and can be customized to match your personal preferences.

    Choosing the Perfect Wooden Wine Rack

    Now that you have a better understanding of the different types of wooden wine racks, it's time to consider some key factors:

    • Capacity: How many bottles do you need to store? Determine the size of your collection and choose a rack that can accommodate it.
    • Style: What kind of aesthetic are you aiming for? Do you prefer a sleek and minimalist design or something more rustic and traditional? Consider the overall style of your home bar and choose a rack that complements it.
    • Space: Measure the area where you plan to place the rack to ensure it will fit comfortably. Consider the available wall space, floor space, or corner space.
    • Budget: Wine racks can range in price, from affordable kits to high-end custom pieces. Set a budget and stick to it.

    Tips for Maintaining Your Wooden Wine Rack

    A little care can go a long way in preserving the beauty and longevity of your wooden wine rack.

    • Dust Regularly: Use a soft cloth or a dust brush to remove dust and debris. Avoid using harsh cleaning products, as they can damage the finish.
    • Protect From Moisture: While wood is naturally resistant to moisture, it's best to avoid placing your wine rack in areas with high humidity. Excessive moisture can cause warping or cracking.
    • Apply Finish: If you want to protect your rack from spills and scratches, consider applying a sealant or varnish. This will help to preserve the wood's natural beauty and make it easier to clean.
    • Handle with Care: When adding or removing bottles, be gentle to avoid damaging the rack or the bottles themselves.

    Conclusion

    An elegant wooden wine rack can be a transformative addition to your home bar. It's more than just storage; it's a statement piece that reflects your discerning taste and love for good wine. With careful planning and attention to detail, you can choose a rack that seamlessly integrates with your space and enhances your enjoyment of the wine you love.

    Read More..

    How to Paint and Decorate Wooden Christmas Ornaments

    How to Paint and Decorate Wooden Christmas Ornaments

    A Comprehensive Guide to Painting and Decorating Wooden Christmas Ornaments

    Wooden Christmas ornaments offer a blank canvas for creativity, allowing you to personalize your holiday décor with unique designs and festive colors. Whether you're a seasoned crafter or a beginner, painting and decorating wooden ornaments is an enjoyable and rewarding activity. This comprehensive guide will walk you through the essential steps, from choosing the right supplies to applying intricate details, ensuring you create beautiful and cherished ornaments for your holiday tree.

    Choosing Your Supplies

    Before embarking on your creative journey, gather the necessary supplies to ensure a smooth and enjoyable crafting experience. Here's a checklist of essentials:

    Wooden Ornaments

    The foundation of your ornaments lies in the choice of wooden blanks. Consider the size, shape, and thickness that best suit your project. Round, heart, star, or even whimsical shapes are readily available. Opt for smooth, sanded wooden ornaments for optimal paint adhesion and a polished finish.

    Paint

    Select acrylic paints as they are versatile, quick-drying, and offer a wide range of colors. For intricate details and fine lines, acrylic craft paints are ideal. If you prefer a glossy finish, choose acrylic paints formulated for a high gloss effect. Alternatively, consider using enamel paints for a durable and long-lasting finish.

    Brushes

    Invest in a variety of paintbrushes with different sizes and shapes to accommodate varying details. Flat brushes are excellent for covering large areas, while round brushes excel in creating fine lines and details. For intricate designs, consider using detail brushes or liners with fine tips.

    Primer

    Applying a primer before painting is crucial, especially for raw wood surfaces. Primer provides a smooth and even base for the paint, promoting better adhesion and preventing the wood's natural grain from showing through.

    Sealer

    Once your ornaments are painted and decorated, a sealant will protect your artwork from scratches, water damage, and fading. Use a water-based acrylic sealant for a glossy finish or a matte sealant for a more subdued look.

    Additional Supplies

    • Scissors for trimming embellishments
    • Glue for securing embellishments
    • Twine or ribbon for hanging
    • Glitter, sequins, and other embellishments for adding sparkle and texture
    • Stencils for creating patterns and designs
    • Craft knife for precise cuts
    • Paint palette for mixing colors
    • Paper towels for cleaning brushes
    • Protective gloves to keep your hands clean

    Preparing the Ornaments

    Before applying paint, prepare your wooden ornaments to ensure optimal results and prevent imperfections. Here's a step-by-step guide:

    Cleaning

    Begin by wiping the ornaments with a damp cloth to remove any dust or debris. Let them dry completely before proceeding.

    Priming

    Apply a thin and even layer of primer to all surfaces of the ornament. Use a small brush to reach corners and crevices. Allow the primer to dry completely according to the manufacturer's instructions.

    Sanding (Optional)

    For a smoother finish, you can sand the primed ornaments lightly with fine-grit sandpaper. This step removes any imperfections and creates a more uniform surface for painting.

    Painting the Ornaments

    With the ornaments prepped and ready, it's time to unleash your creativity and bring your visions to life. Here are some techniques and tips for painting your ornaments:

    Base Coat

    Begin by applying a base coat of your chosen color to all surfaces of the ornament. Use light, even strokes to avoid streaks. Allow the base coat to dry completely before applying any subsequent layers or designs.

    Adding Patterns and Designs

    • Freehand painting: Unleash your artistic flair and paint directly onto the ornaments with brushes of various sizes.
    • Stenciling: Choose stencils with festive designs or create your own. Secure the stencil onto the ornament with painter's tape and apply paint over the openings.
    • Sponging: Use a sponge to create textured patterns or to apply paint in a distressed style.
    • Stamping: Use craft stamps with various shapes and designs to create repetitive patterns or add unique elements.

    Layering and Detailing

    Once the base coat is dry, you can add layers of color, details, and embellishments. Allow each layer to dry completely before applying the next to avoid smudging. Use fine-tipped brushes for intricate details and outlining.

    Finishing Touches

    After adding all your designs and details, consider adding a finishing touch for extra sparkle or dimension. You can sprinkle glitter, glue sequins, or use other embellishments to personalize your ornaments.

    Securing and Finishing

    With your painted ornaments complete, it's time to secure them and add a finishing touch to protect your hard work. Here are the final steps:

    Sealing

    Apply a sealant to the finished ornaments to protect the paint and prevent fading. Use a sealant specifically designed for acrylic paints and apply it evenly with a brush. Allow the sealant to dry completely before handling.

    Attaching Hangers

    Choose a hanging method that suits your style. You can drill a small hole at the top of the ornament and thread a ribbon or twine through it. Alternatively, glue a small loop of ribbon or twine to the top of the ornament.

    Storage and Care

    To ensure your ornaments last for years to come, follow these storage and care tips:

    Storage

    Store your finished ornaments in a cool, dry place away from direct sunlight. Protect them from dust and moisture by placing them in a storage container or box.

    Cleaning

    Gently wipe off any dust or grime with a soft cloth. Avoid using harsh cleaners or abrasive materials that could damage the paint.

    Creative Inspiration

    Embrace your creativity and explore a variety of decorative ideas for your wooden ornaments:

    Festive Themes

    Consider incorporating festive themes like snowflakes, reindeer, Santa Claus, snowmen, or Christmas trees. Use bold colors like red, green, white, gold, and silver to create a truly festive look.

    Nature-Inspired Designs

    Bring the beauty of nature indoors with designs featuring pine cones, holly berries, or winter scenes. Use muted shades of green, brown, and white to create a rustic and charming feel.

    Personal Touches

    Add personal touches to your ornaments by incorporating initials, names, dates, or special messages. Use metallic paints or embellishments to make your ornaments truly unique.

    Conclusion

    Painting and decorating wooden Christmas ornaments is a wonderful way to add a personal touch to your holiday décor. From classic designs to modern trends, the possibilities are endless. With the right supplies, techniques, and a little creativity, you can create beautiful and cherished ornaments that will bring joy to your family and friends for years to come.

    Read More..